Thursday, June 24, 2010

Must-Have: GO SMiLE Touch-Up Perfecting Ampoules

I drink a lot of coffee. I mean, A LOT of coffee. I could list off many reasons why I like it but I think it might be easier to say why I don’t… I get “coffee smile”! Even though always go get my teeth cleaned at the dentist every 6 months, I like to keep my smile white in between visits – that’s why I use GO SMiLE Touch-Up Perfecting Ampoules. In fact, check out my before/after picture below! The results shown are from using only the Touch Up Ampoules approximately twice a week for 6 months NOT the complete GO SMiLE whitening system.


I think I’ve officially tried every teeth whitener out there. Let’s see… I’ve used whitening toothpastes, whitening rinses, whitening strips, teeth whitening stuff you “paint” on… and none of it has worked for me. Not to mention, all those whiteners made my teeth hurt after the first application. The last place I would have guessed I’d find teeth whitener was at a makeup store! About 6 months ago I was actually shopping for some face moisturizer at Sephora and just so happened to walk by the GO SMiLE display. I saw someone trying out a sample and they seemed really happy with the results (I guess at this point I was willing to try anything!)

GO SMiLE is different than other whitening products. There aren’t any trays or strips - just a cute little ampoule filled with GO SMiLE’s teeth whitener. I love their slogan: Flip, Pop, Whiten! That’s all you do!


Here are the highlights:

GO SMiLE Touch Up Smile Perfecting Ampoules (7 count)
Cost: $10 at Sephora
Color: clear
Scent/Flavor: Fresh Mint, Watermelon Mint, and Green Apple
Texture: Liquid-Gel
Apply using: patented ampoule technology
Leaves your teeth feeling: clean, noticeably whiter after one application
Rating: <> <> <> <> <>

I really like this product because it is easy to use and convenient. It’s also like a mini toothbrush! After you use the product, it feels like you just brushed your teeth. So it’s great for taking on a date, using before meetings at the office, or just anywhere you’d like to have a toothbrush. The best part is that it doesn’t make my teeth hurt like some of the other whitening products out there. I’ve used this product for quite some time now and I haven’t noticed any increased sensitivity. There are three flavors you can choose from: Fresh Mint, Watermelon Mint, and Green Apple. I’ve tried all three and like the Watermelon Mint the best. The flavors aren’t strong so people won’t think you’ve seriously been downing Jolly Ranchers or Fruit Stripe Gum.

One other thing I do to repel stains on my teeth caused by coffee, tea, or dark colored wines is to drink some water after I get done drinking my beverage. Water is the universal solvent so it helps to rinse away those stain causing molecules. So, drink up! That’s just another reason why water is good for you.

Although I haven’t tried the GO SMiLE's total whitening system, these touch up ampoules still work pretty well. For me, this was the first whitening product I’ve used where I got IMMEDIATE results. After using one of the ampoules, my teeth look noticeably whiter. Just remember - everyone’s teeth are different so you might get slightly different results. Also, if you’re unsure about starting an at-home whitening system give your dentist a quick call to get some advice.

GO SMiLE has a great website. They compare their products against all the other types of products: strips, paint-ons, trays & gels, rinse & toothpastes, and in-office procedures. You’ll be amazed at the results! http://www.gosmile.com/how_it_works?2

Speaking of smiling, Charles Reade has a good point: "Beauty is power; a smile is its sword,” but I think Jean Kerr has a good point too: “I’m tired of all this nonsense about beauty being only skin-deep. That’s deep enough. What do you want - an adorable pancreas?”

Stay Sunny,
Mrs. Sprinkles

Tuesday, June 22, 2010

Mom's Advice: "Don't rub your makeup off - you just put it on!"

Mom here… One thing that always annoyed me is that I would get done with my makeup in the morning and by the time lunch came around it would either look cakey or look like I didn’t have any makeup on! I’ve got TWO easy (and cheap!) fixes for that! Use a setting powder and setting spray.

Setting your makeup with a powder is an important step in finishing your makeup. The powder creates a shield that keeps humidity, moisture, and pollution from making your makeup come off or look cakey.

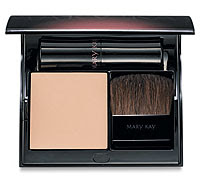
For my setting powder, I use the Mary Kay Sheer Mineral Pressed Powder. I love it because it is feather light, it allows my true skin color to show through, it never shows shine - bottom line! It lasts! Get it online for $16 on Mary Kay's website: Click here to go to the Mary Kay website.

Important things to remember:

Don’t wipe or rub on your setting powder on your face – you’ll rub away your foundation.

Don’t tap it on your face. Too much powder gets transferred to your face giving an instant cake effect.

Do roll it on your face. Using a powder puff, start in one spot on your face and using a rocking motion roll the powder onto that area. Roll the powder all over your face. Don’t put too much, just a light covering will work. Lightly use your powder puff over your eyes before putting your eye makeup on. This works like a base for the eye makeup and mascara.

One last step in setting your makeup is to use a setting spray. Take an atomizer, fill with distilled water, hold 8-10 inches away from your face and lightly spray on your face. The small amount of the moisture gives your face an instant flawless appearance. My mom did this in 60s, I did this in the 80s, and my daughter does this now! Sephora (www.sephora.com) sells quite a few good atomizers for $6 - $10.

By the way, as much as I want to agree with you... CUPCAKES aren't a breakfast food.

Love,
Mom

Saturday, June 19, 2010

Beauty Bummer: Anastasia Mini Wax Kit

Believe me, taking the time to shape your eyebrows is worth it. Having nicely shaped and filled in brows brings the lots of attention to your eyes. My eyebrows aren't perfect at all. I get my sweet brows by using the Anastasia Brow Powder, Brow Gel, and Highlighting Pencil! I'm going to write a review on the Anastasia Brow Kit so stay tuned! Why do I love these products so much? Take a look at my before and after pictures below:

I'm sure you can see that well-groomed brows really change your look! Before my eyes looked tired and dull, but JUST by using the brow powder, gel, and highlighting pencil - I've brightened my appearance and contoured my brow bone to bring out my eyes.

I purchased the Anastasia Mini Wax kit because (as you can see in the picture above) Anastasia makes some great products! Well, as for the Anastasia Wax Kit... Welcome to Disappointment City! The directions in the kit say to first heat up the wax in the microwave. Then apply the heated wax to your brow using the small sticks provided. Finally apply a muslin strip over the wax, wait a minute or so, then remove the muslin strip. The first problem I encountered is that when I applied the wax then placed the muslin strip over the wax and waited… and waited… the wax NEVER became tacky or hardened slightly (like hot brow waxing is supposed to do!). When I pulled the muslin strip off, NONE of the stray hairs were removed. The wax stuck to my face and I had a difficult time removing it. It was like the wax wasn’t tacky or sticky enough to adhere to the hair and the muslin. Also, the kit doesn’t come with any azulene oil (used to calm the skin and slow hair growth) or anything similar. I was very disappointed. To sum it up in one sentence, it didn’t even look like I waxed my eyebrows.

Anastasia Mini Wax Kit
Cost: $12 at Sephora
Color: the wax is light brown
Scent: Light citrus
Texture: Liquidy, More gummy than sticky
Apply using: small sticks (provided), remove using muslin strips
Leaves your skin feeling: Hot/Burning, Sticky
Rating: <>

A better product to use is Parissa Mini Wax Strips. These are so easy to use and you get great results. It comes with the CUTEST instruction booklet I’ve ever seen. The instructions are very detailed – it’s not just about waxing, the instructions show you how to SHAPE your eyebrows based on your face shape!

There are 8 applications per sheet which makes 32 applications total (enough for 1 brow design and probably enough for 3-4 touch ups). Each sheet is two pieces of clear plastic stuck together with 4 little rectangles of wax. There’s a lot of plastic surrounding each piece of wax so you have really good control when aligning and pressing them on your brow. When you cut off one of the wax rectangles from the sheet and separate the plastic apart you will have actually two wax applications. All you do is take one of the applications – don’t touch the sticky side! – and press the wax on in the direction of the hair growth onto the area where stray hairs need to be removed. To remove, hold your skin taut with one hand and with your other hand quickly pull the strip off in the opposite direction of hair growth. Following up with the azulene oil that’s provided smooths your skin and removes any excess wax. These aren't complete instructions so just refer to the directions provided in the box. They are very clear and easy to follow.

Parissa Express Mini Wax Strips Eyebrow Design
Cost: $9 at Ulta
Color: the wax is white/opaque
Scent: None
Texture: Sticky, but even if you accidentally touch the wax it still stays sticky!
Apply using: clean hands, use a cotton ball for the azulene oil
Leaves your skin feeling: Smooth
Rating: <> <> <> <> <>

One more comment about this product... In the box is says not to wash your skin before you use it. The reasoning is that the oil from your skin helps the wax adhere to the hairs and not the skin. I had a little bit of eye makeup on when I applied the wax so the first few applications didn't work as well. Next time, I might use cotton ball to remove any excess makeup.

With any hair removal system, you might get a little redness where the wax was applied and removed. It depends on your skin type. If you're not sure, you can always test a small area to test for allergies and  sensitivities. I have sensitive skin but I noticed that by the next day after using this product the little bit of redness I had was gone. The Anastasia wax kit left my eyebrow area very red for at least 2 days.

Maybe I just might need to take a trip to Hollywood to see that “Anastasia technique," but while I save up, I’m going to stay with Parissa to stay beautiful! 

Stay Sunny,
Mrs. Sprinkles

Friday, June 18, 2010

Happy Father's Day! DiY: Shaving Kit for Dad

Well, I have a new name apparently. I found out yesterday my name is now Mr. Sprinkles (Obviously, I’m married to Mrs. Sprinkles)… and, apparently, I’m going to be a guest writer. On a makeup blog. Writing about how much I like something. Well, okay. I’m willing to try anything I guess… For Father’s Day, I’m going to help you built a great a great gift for Dad – a DiY shaving kit.

You’ll Need:
  1. Shave Brush
  2. Shave Cream
  3. Razor
  4. Gift Wrap

First, you’ll need a shave brush. I recommend the Omega badger hair shave brush ($32 on www.amazon.com). I wouldn’t get a boar’s hair brush because I’ve read that this type of brush falls apart easily. It’s also not as smooth as a badger hair shave brush. It’s kind of rough at first, but the more you use it the softer it gets. It comes with a stand so you can store it with the bristles down otherwise water builds up in the handle and the bristles fall out.

Next, you’ll need a shaving cream. I recommend the C.O. Bigelow Shave Cream ($10 at www.bigelowchemists.com and select Bath and Body Works stores). It’s actually Proraso shave cream from Italy. Check out this link: http://www.classicshaving.com/catalog/item/522960/381257.htm. It’s Italian shave cream but it's just packaged and sold by C.O. Bigleow. I like it a lot mostly because of how great it smells.

Lastly, you’ll need a razor. I recommend the Gillette Fusion (~$9 at Target). I consider myself a techy-type dude so I guess I would get excited that it uses batteries. Since it's battery powered, the vibrations help you get a closer and smoother shave.

Gift wrap? Put it in a Target bag. Once you tie it up, you’ve got an instant bow. Well, that was easy!

Off to play golf,
Mr. Sprinkles

Thursday, June 17, 2010

Must-Have: Chanel Rogue Allure Luminous Satin Lip Colour


Out there, somewhere, there are some brilliant people. These people have some how crammed luxury, glamour, and sophistication into a little 0.12 ounce tube… No need for guessing. I’m pretty sure they’re at Chanel.

I want to reminisce for a moment… This might be unbelievable but I didn’t start wearing makeup until my junior year in high school. I wasn’t really interested in it maybe because I hadn’t tried the right thing. I’d try some stuff on sale but it didn’t really enhance my appearance so I just let it go and forgot about it. Well, it was time for junior prom and I had a beautiful custom-ordered cheongsam to wear… and I hadn’t thought more than 2 seconds about my makeup! Luckily, my mom HAD thought more than 2 seconds and booked me a makeover at the Chanel counter in the mall. Long-story-short, the makeover was so much fun! I tried on nearly everything in every color. I really felt GORGEOUS! Thanks mom – when I walked out, I could officially say “I’m addicted!” The bad news is that I hadn’t realized it for nearly 7 or 8 years.

The point I’m trying to make is Chanel makes A LOT of excellent products - not just makeup but face care and cleansers too! They’re always on the forefront of the newest trends but will always have that timeless flair. The truth is I’ve been buying their products since high school!

The Chanel Rogue Allure Luminous Allure Satin Lip Colour is a must-have! It has a super silky texture that glides on your lips evenly so you don’t waste your product by caking it on. The colors are amazing! When you look at the color in the tube THAT is the color you’re putting on. I’ve noticed so many lipsticks look great in the tube and then they look totally different on your lips. In addition, I’ve used many lipsticks that leave my lips feeling dry but I really feel that Chanel’s lipsticks actually moisturize your lips! Recently, my favorite color has been #11 Surprise. Read the summary below to find out some more details.

Chanel Rogue Allure Luminous Allure Satin Lip Colour
Cost: $30
Color: Many colors available, Excellent swatches at http://www.neimanmarcus.com
Scent: None
Texture: Silky soft texture (but not so soft as to feel mushy when applied)
Apply using: easier using the lipstick itself, don’t recommend using a lip brush
Leaves your skin feeling: Hydrated, Smooth
Rating: <> <> <> <> <>

Check out the fragrances too! You’ll fall in love with Chance eau de toilette in the spring/summer and Coco eau de parfum in the fall/winter.

Once you feel the glamour, you’ll be addicted too!

Stay Sunny,
Mrs. Sprinkles

Tuesday, June 15, 2010

I Love Recycling!: St. Ives Fresh Skin Invigorating Apricot Scrub

Typically, Allure Magazine is pretty good about recommending good products. There’s a column that is published yearly called the Reader’s Choice Awards. I noticed this product was listed in the 2009 Award list. After reading about it, I bought it thinking it was going to be a good product. This product smells great BUT, unfortunately, two days after using this product my skin felt really dry and was very itchy! It also made my skin breakout. I felt that it was just too harsh for my sensitive skin. It exfoliated my skin way too much! I talked with beauty consultants at Sephora and Ulta and all of them told me to just toss this product! Here's a little summary:

St. Ives Fresh Skin Invigorating Apricot Scrub
Cost: 6 oz is $3-$5 (I bought the $1 trial size at Target)
Color: Light tan/brown
Scent: Very peachy
Texture: Moderately gritty
Apply using: clean hands
Leaves your skin feeling: Dry
Overall: <> <> <>

RECYCLING OPTION: Use this as a hand or body exfoliator! I haven’t noticed it making my hands or feet feel dry at all. It might be too harsh for your face but it smells great and makes your hands and feet silky smooth!

If you want an excellent exfoliator, use Clinique’s Clarifying Lotion (it’s actually a liquid!). It's an exfoliator because the ingredients promote the growth of new skin cells so it isn't as harsh as scrubs. I recommend going to http://www.clinique.com/and clicking on My Skin Consultation to determine which Clarifying Lotion is the best for your skin type. I’ve used #2 and #3 – both work great! Here's another short summary:


Clinique Clarifying Lotion #2 and #3

Cost: 6.7 oz is $11.50
Color: Depends on the type of skin you have but the color doesn't matter anyway
Scent: None
Texture: Liquid
Apply Using: Cotton ball or cotton square
Leaves your skin feeling: Tingly, Moisturized
Overall: <> <> <> <> <>


One more recommendation: Follow-up with the Clinique Moisture Surge.


Or, old-school-it, like my mom, and use her homemade toner! She posted the recipe on Sunday, June 14.

Stay Sunny,
Mrs. Sprinkles

Sunday, June 13, 2010

Mom's Advice: "It's always best to start with a clean face!"

Mom here… I’m glad you finally decided to listen! My daughter realized that maybe mom COULD be right! Well, let me start by telling you a little about me. I’ve been a cosmetologist for 15+ years so you could say I have a little experience in the field. At one point I owned my own salon, and believe me, THAT was an adventure in itself! I especially love cutting hair but I also have some makeup tips that will save you time and money! I don’t do fancy stuff at all. I’m a ‘back-to-the-basics’ kinda person – why fix something if it’s not broken?!

I’ve always said that starting with a clean face is the best way to prime your face for makeup. Every so often, I’ll use my vinegar-based toner. It is very gentle and all natural. It effectively removes makeup and cleanser residue and primes your face for makeup by neutralizing the pH of your skin. Your makeup goes on smooth also promotes an even skin tone.

Remember chemistry class? Acids and bases react! Pollution and old makeup can leave your skin very alkaline (basic!). The vinegar is acidic. The acid and base reacts and the reaction REALLY cleans your face! In my opinion, just using face primers or other creams without effectively cleaning your face just covers up the pollution and old makeup residue. New makeup starts as a neutral pH so after using this toner you won’t get a reaction when you put the new makeup on your skin because there aren’t any alkaline substances to react!

Here's the recipe: Fill a large mixing bowl about half full with cold water (about 4-6 cups). Add a little splash of apple cider vinegar (about 1/8 cup). This doesn’t have to be exact, just estimate! Using your hands, rinse your face with the mixture 5-8 times.

Promise me you’ll eat your vegetables! They’re good for you!

Love,
Mom

Saturday, June 12, 2010

DiY: Let's Go! Makeup Bag


I’m always in a hurry – but I always have time for makeup! Here are my ‘can’t live withouts’ that I use to create a flawless, natural look in minutes! I timed it! This look took 4 minutes, 58 seconds!


My kit includes:
BareMinerals Mineral Veil (Mini Refillable Buffing Brush) - $22 at Sephora
Too Faced Bronzer (or BareMinerals Warmth All-Over Face Color) - $28 at Sephora
Anastasia Brow Powder, Setting Gel, Brow Highlighter - Can purchase separtely but I recommend the Perfect Brows and Eyes set, $75 at Sephora 
Covergirl Lash Blast Luxe Mascara - $8 at any drugstore, Target, Walmart
Aquaphor - $6-$8 at any drugstore, Target, Walmart

First, lightly cover your face with Bare Minerals Mineral Veil using the refillable buffing brush. This works similar to foundation by evening out your skin tone but isn’t as heavy as a full foundation. Next, with swirl your blush brush with Too Faced Bronzer (or Bare Minerals Warmth All-Over Face Color) and lightly sweep on your cheekbones. Remember, start out with a little bit of bronzer – you can always add more! Make sure to add a little bit of the bronzer all over your face so you get a more natural look: Do one large sweep from cheekbone to cheekbone going over your nose and a few small sweeps on your forehead and chin. Next, use the Anastasia Brow Powder to fill in your eyebrows. I recommend Anastasia’s Mini Duo Angled/Spooley 7 tool but you can also use a clean mascara wand to comb your brows in place and distribute the powder evenly. Use the Anastasia Setting Gel (clear mascara also works!) to keep your brows looking fabulous all day. Lastly, use the Anastasia Brow Highlighter pencil to add dimension and complete your look using Covergirl Lash Blast Luxe Mascara. This mascara is great because it doesn’t clump. It also has a hint of glitter to make your eyes sparkle! Finally, don’t forget your lips! Aquaphor makes your lips silky smooth and it isn’t sticky. Check out the picture below to see the results! Pack your makeup kit in a small cute bag and you’ve got a DiY makeup kit that makes you ready for any adventure. Let’s go! You’ve got places to be and people to meet!


Stay Sunny,


Mrs. Sprinkles

About my blog

Hi Beauties! I know you’re reading my blog because you want to know more about the BEST beauty products to use (and the not-so-best products!). All the products I write about I’ve tried and the views expressed in my blog are my personal opinion. I decided to start a beauty product review blog because reading about other people’s experiences are so helpful in choosing products I’ve never tried. I would search the Internet and magazines … and search… and search… and sometimes I just couldn’t find a review on a product! Hopefully, writing about my experiences with beauty products will help you! Every weekend, I’ll make a new post but check back often for updates!

For reviews, I’m going to use the Five Diamond Rating scale. If a product is excellent and it does exactly what it says it will do, I’ll give it FIVE DIAMONDS: <> <> <> <> <>. A product that makes my skin worse or doesn’t do what it says will get ONE DIAMOND: <>. Often, products will be somewhere in between and they’ll receive between TWO and FOUR DIAMONDS.

Here’s a preview of the article categories... You'll read about makeup, shampoo, conditioner, hair treatments, hair styling products, skin care, dental products (like teeth whiteners), nail care, and more!

DiY (Because YOU can do it!)

I Love Recycling!> (Don’t get rid of bad products – Use them in a different way!)

Mom’s Advice (I’m going share with you special beauty secrets my mom shared with me!)

Must Haves (Beauty products SO GREAT you’ll never go back!)

Ask Mrs. Sprinkles (Drop me a note - ask me a question, request a review, or just see what's going on! I’ll post your e-mail question along with my answer.)

Beauty Bummers (I’m always optimistic but these products weren’t all that great. Read these reviews so you don’t waste your money!)

... and more!


Don’t forget, no matter what I write, remember that INNER BEAUTY shines – it is what really makes YOU beautiful!


Stay Sunny!

Mrs. Sprinkles